
Jerry Murland – författare
Visar alla böcker från författaren . Handla med fri frakt och snabb leverans.
42 produkter
42 produkter
Häftad, Engelska, 2022
176 kr
Skickas
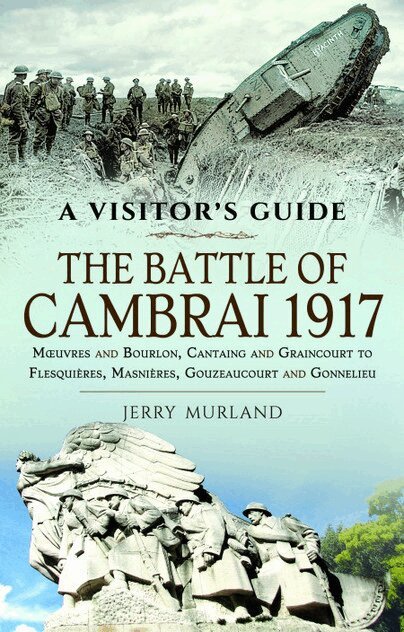
The 1917 Battle of Cambrai featured the first massed tank attack in military history and provoked the biggest German counter-attack against the British since 1914. The British aimed to break through the German Hindenburg Line, then threaten the rear of the German positions to the north. The battle is one of the most famous and controversial episodes of the First World War, and the battlefield is one of the most commonly visited on the Western Front. Jerry Murland's clearly written, highly illustrated guide is the ideal introduction to it.Visitors can trace for themselves the course of the battle across the modern landscape and gain a fascinating insight into the nature of the fighting - and the wider conflict across the Western Front - throughout the war. Included are a series of routes that can be walked, cycled or driven. Among the key sites covered are Haverincourt, Flesqui res, M uveres, Graincourt, Cantaign, Marcoing and Masni res, Bourlon, La Vacquerie and Villers-Plouich, Gouzeaucourt and Gonnelieu.In each place Jerry Murland describes the fighting that occurred there, recording what happened, exactly where it happened and why, and he points out the sights that remain for the visitor to see. His guidebook is essential reading for visitors who wish to enhance their understanding of the Battle of Cambrai and the war on the Western Front.
Häftad, Engelska, 2022
166 kr
Skickas
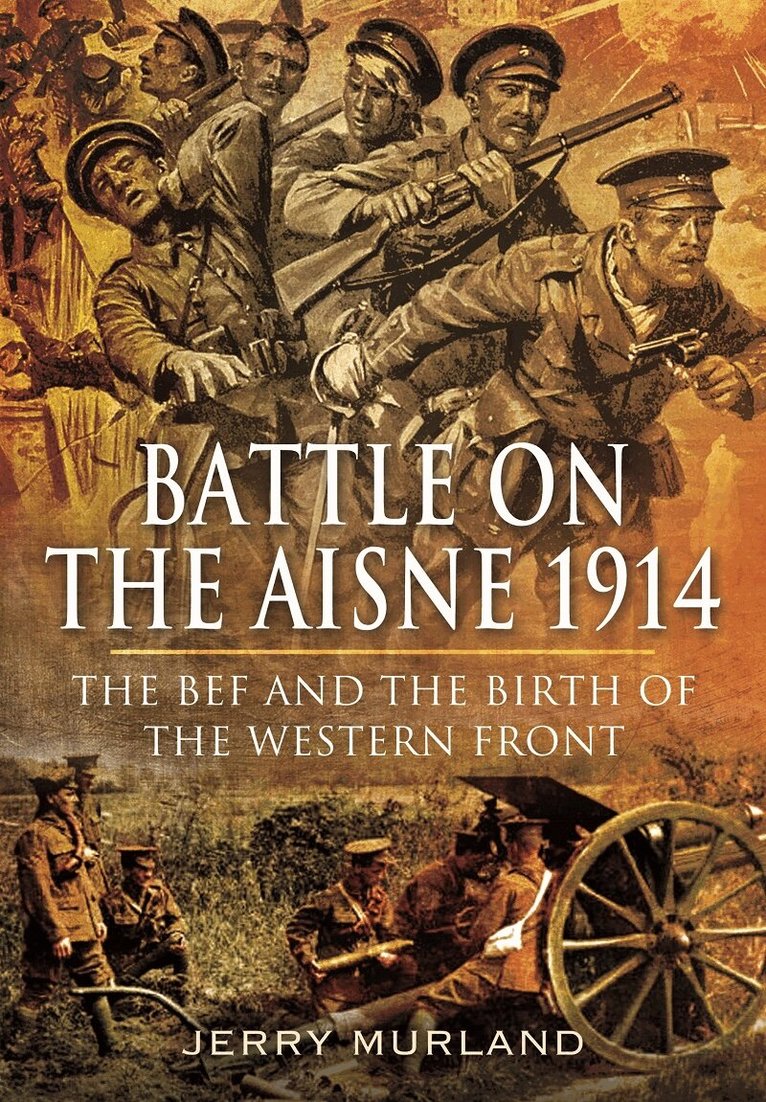
The river Aisne featured prominently in August 1914 during the Retreat from Mons and in September was the scene of bitter fighting when the BEF re-crossed it in their unsuccessful attempt to dislodge the German Army entrenched along the Northern Crest.The fighting was hugely costly to the BEF which had already fought three major engagements and marched over 200 miles in a month. The three British Corps lost over 700 officers and some 15,000 men. Little wonder one officer wrote that he felt he was in the company of ghosts.Historian Jerry Murland places the Aisne battles in their context, both from the BEF and German viewpoints. He highlights the early deficiencies and unpreparedness of the British Army staff and logistics organisation as well as friction among the command structure, all of which hampered effective operations.

Inbunden, Engelska, 2022
219 kr
Skickas
While much has been written about the Battle of Britain, the air war over France and the Low Countries from September 1939 to June 1940 has been largely neglected - until now. As expert aviation author Jerry Murland reveals in this fascinating book, there may have been little ground action until May 1940 but the war in the air was far from phoney'.In contrast to their adversaries, the Allied air forces on the mainland of Europe were poorly equipped, regardless of increased development from 1934 onwards. But in spite of this, when the German invasion began, the Low Countries of Holland and Belgium fought back tenaciously. While development of the Spitfire, Blenheim and Wellington was continuing at a pace, the RAF with only four squadrons of Hurricanes among a force of outdated bi-planes, was a little more prepared than the French, but still woefully outgunned by the Luftwaffe.While the Allied air forces of Britain, France and the Low Countries may have been inferior, the gallantry and tenacity of their pilots makes for inspiring reading.This is a work that will enthral and inform all those interested in the history of the Second World War, particularly aviation enthusiasts.
E-bok
Engelska, 2021122 kr
Läs direkt efter köp
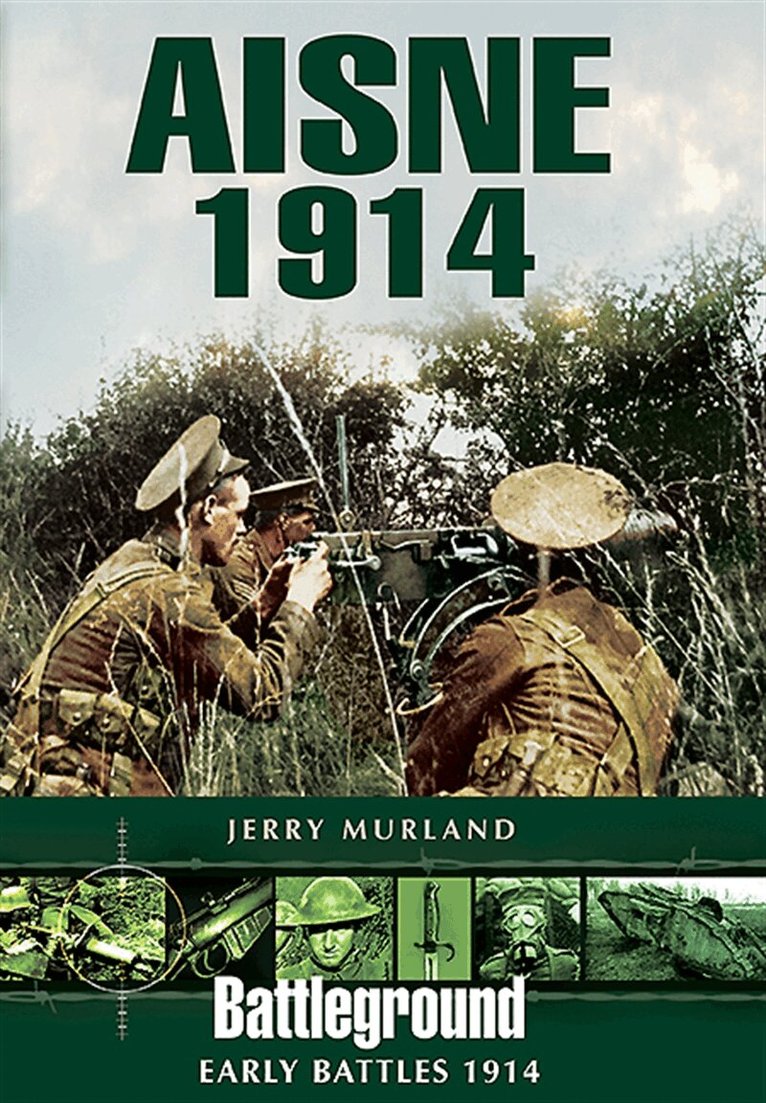
The 1914 Battle of the Aisne, officially from 12 – 15 September, came about as a result of the German retirement from the Battle of the Marne, which took place further south as the huge conscript armies of France and Germany jostled for position almost within sight of Paris. By the time the British arrived on the Aisne the battle line stretched some 150 miles from Noyon in the west to Verdun in the east and it was only along a tiny fifteen mile sector in the middle that the The British Expeditionary Force was engaged. However, it fought bitter engagements, which took place in difficult conditions and casualties were heavy. The Aisne fighting was the final attempt by the allies to follow through from the success of the Marne. It also marked the successful establishment by the Germans of a sound defensive line on this part of the front.As seen in 'Scale Military Modelling Monthly'.
E-bok
Engelska, 2021123 kr
Läs direkt efter köp
Mons to the Marne, the latest volume in Pen & Sword's Battle Lines series of walking, cycling and driving guides to the Western Front, is the essential companion for every visitor who is keen to retrace the path taken by the British Expeditionary Force immediately after the outbreak of the First World War. All the most famous battle sites of the Great Retreat are featured here.
Expert guides Jon Cooksey and Jerry Murland take visitors over a series of routes that can be walked or biked or driven, explaining the fighting that occurred in each place in vivid detail. They describe what happened, where it happened, and why, and who was involved, and point out the sights that remain there for the visitor to see.
Their highly illustrated guidebook is essential reading for visitors who wish enhance their understanding of the fast-moving campaign that preceded the war in the trenches. It gives a fascinating insight into the experience of the troops, the terrain over which they fought and the character of fighting itself.
As featured in the Stratford-upon-Avon Herald.
E-bok
Engelska, 2021126 kr
Läs direkt efter köp
The German Spring offensive or Kaiserschlacht was a period of great danger for the Allies. Both sides were exhausted after years of bitter fighting and huge losses. While eventually catastrophically unsuccessful and the prelude to their final defeat, the Germans forced the Allies back over hard-won ground until the tide turned.
Historian Jerry Murland has researched and visited the scenes of desperate actions during late March 1918. He describes in graphic detail the battles fought by British, Irish and South African regiments in the area from St Leger in the North to La Fere in the South. He unearths the extraordinary stories of unit and individual courage. He also examines the work of the Royal Engineers who blew bridges and disrupted lines of communication.
This original approach covers battles that in many cases have only been described briefly in official histories. The book is a useful companion for any battlefield visitor.
E-bok
Engelska, 2021122 kr
Läs direkt efter köp
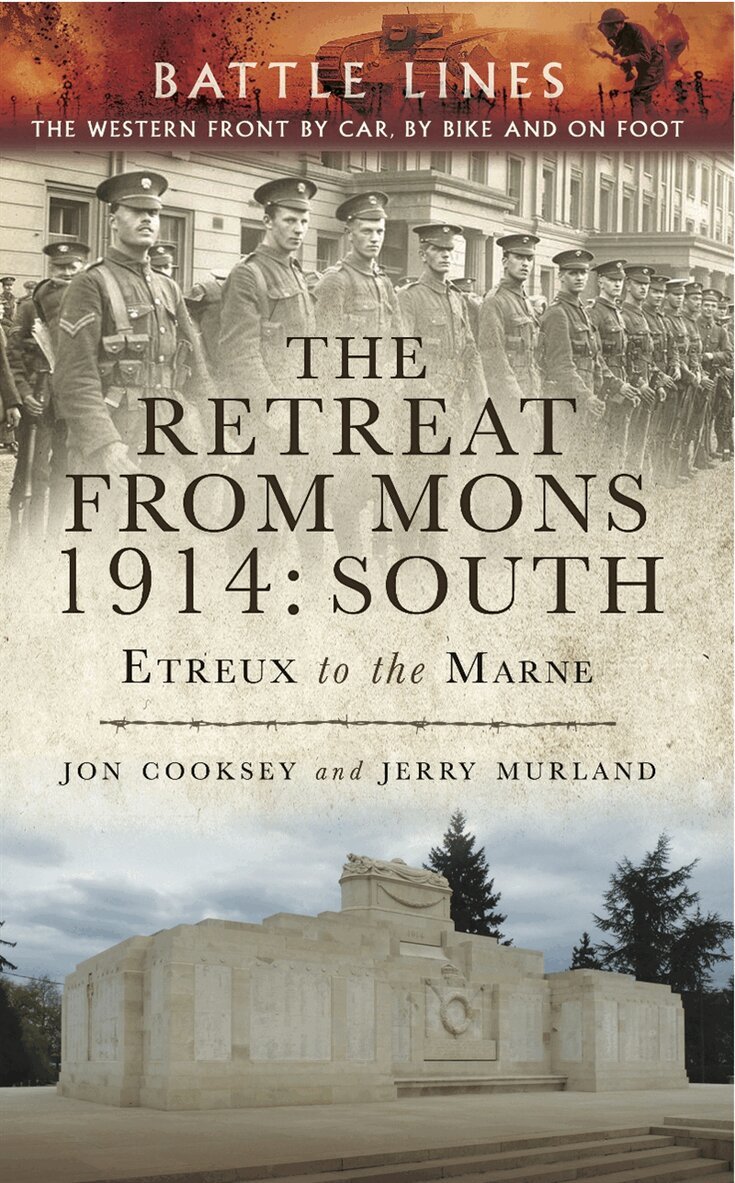
The Retreat from Mons 1914: South is the second volume in Pen & Sword's Battle Lines series to cover the opening campaign of the Great War. It is the essential companion for every visitor who is keen to retrace the path taken by the British Expeditionary Force immediately after the outbreak of the conflict – all the important battle sites of the second stage of the retreat are featured here.
Expert guides Jon Cooksey and Jerry Murland take visitors over a series of routes that can be walked, biked or driven, explaining the fighting that occurred at each place in vivid detail. They describe what happened, where it happened and why and who was involved, and point out the sights that remain for the visitor to see.
Their highly illustrated guidebook is essential reading for visitors who wish to enhance their understanding of the fast-moving campaign that preceded the war in the trenches. It gives a fascinating insight into the experience of the troops, the terrain over which they fought and the character of the fighting itself.
E-bok
Engelska, 2021122 kr
Läs direkt efter köp
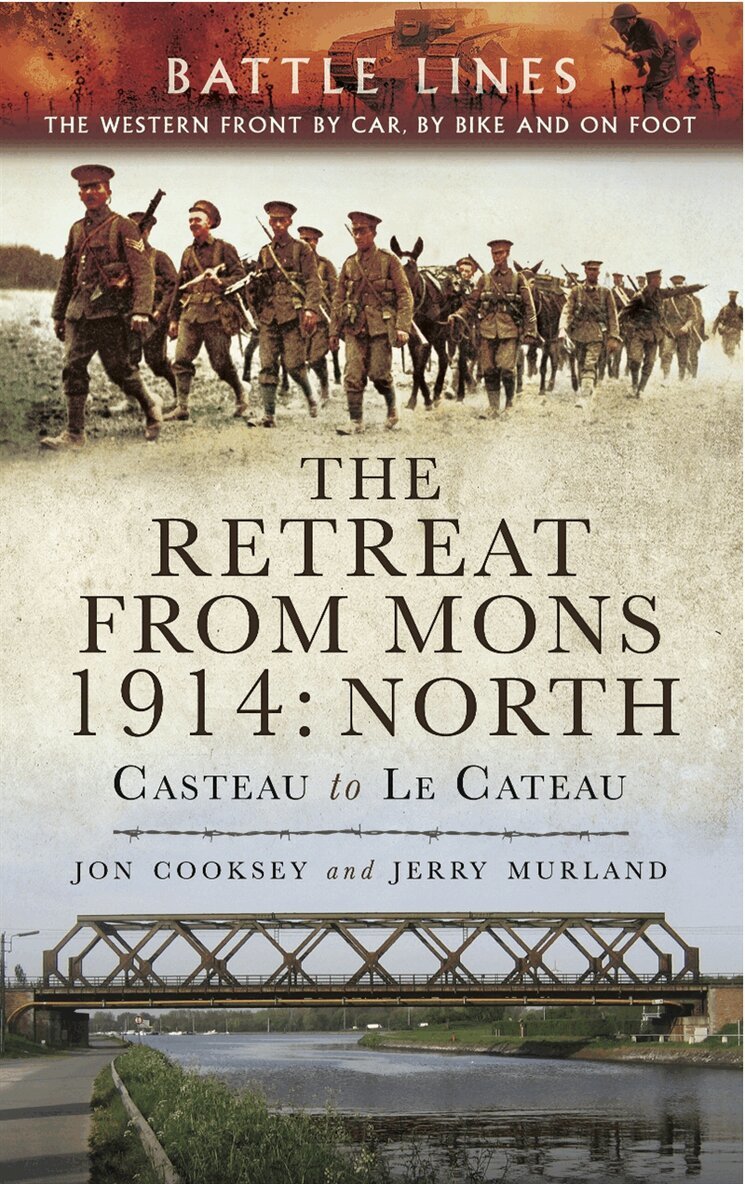
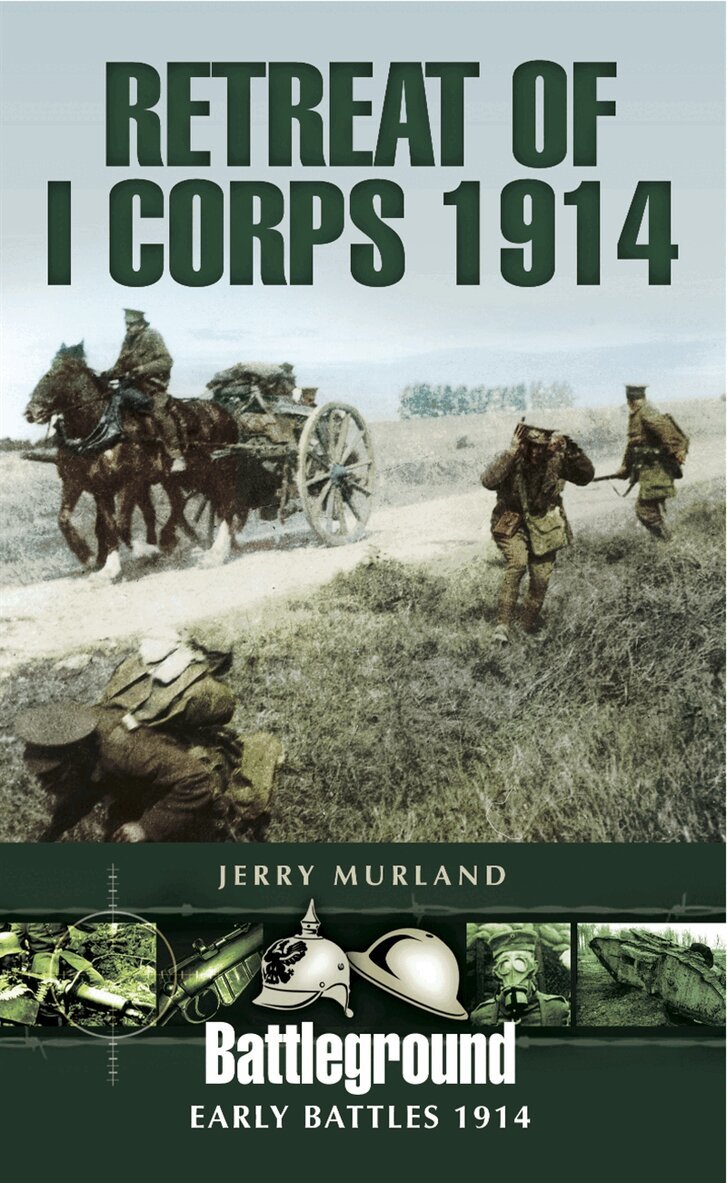
On 23 August 1914 it was only the two divisions of General Smith-Dorrien's II Corps that were directly engaged with the German First Army along the line of the Mons-Conde Canal. As the British Expeditionary Force withdrew from Mons and bivouacked around Bavay on 25 August, Sir John French and his GHQ advisors – unsure of the condition of the routes through the Forêt de Mormal - ordered the British Expeditionary Force to continue their retirement the next day and to avoid the 35 square miles of forest roads.Consequently II Corps used the roads to the west of the Forêt de Mormal and Sir Douglas Haig's I Corps those to the east – with the intention that the four divisions should meet again at Le Cateau. It was an intention that was ambushed by circumstance as I Corps encountered units of the German 7th Division at Landrecies on 25/26 August. Unsure of the weight of the German attack at Landrecies, Douglas Haig hurriedly left for Grand Fayt and ordered his two divisions to immediately begin their retirement along a route that would take them west of Le Cateau. It was this decision that kept the by now five divisions of the BEF apart until 1 September and is the subject of this book. I Corps was now coming under attack from the German Second Army and the resulting rearguard actions that Haig's men were involved in are covered in this volume:

Häftad, Engelska, 2018
166 kr
Skickas
The network of canals stretching from the coast at Gravelines, through St-Omer, B thune and La Bass e, follows the approximate boundary between Artois and Flanders and was, in 1940, the defensive line established on the western edge of the so-called Dunkerque Corridor designed by Lord Gort to provide an evacuation route to the channel coast. Even before events on the line of the Escaut line had concluded with yet another Allied withdrawal, Lord Gort was diverting units to bolster the Canal Line defensesThis is probably the first occasion that the fighting along the Canal Line has been looked at in detail; overlooked by the inevitable withdrawal towards the channel coast, the units deployed along the canal faced some of the stiffest fighting in the whole 1940 France and Flanders campaign. Whole battalions, particularly those in the 2nd Division, were sacrificed as units were thrown into the battle in an attempt to slow down the German advance. The book looks in some detail at the ad hoc nature of the Usherforce and Polforce units, the units of the independent 25 Brigade and the vicious fighting that enveloped the 2nd Division. Time is given also to the notorious massacre of the Royal Norfolks at Louis Creton's farm near Le Paradis.Material concerning the deployment of units along the Canal Line in 1940 has been found in a variety of sources, including regimental histories and unit war diaries. The author has been fortunate in being able to access a number of personal diaries and accounts from men serving with the independent 25 Brigade and the 2nd Division, which has, in some cases, added to and enhanced the actions taken by those units while deployed on the canal.The book is illustrated by over a hundred contemporary and modern photographs and by five car tours and three walks, all of which give the tourist a greater access to the battlefield.
Häftad, Engelska, 2019
166 kr
Skickas
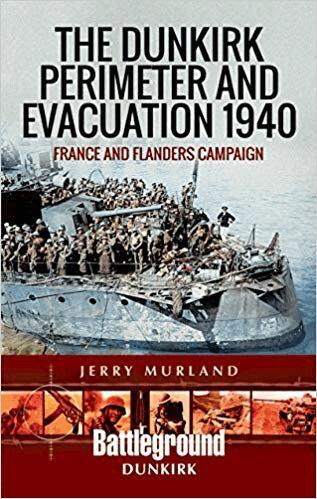
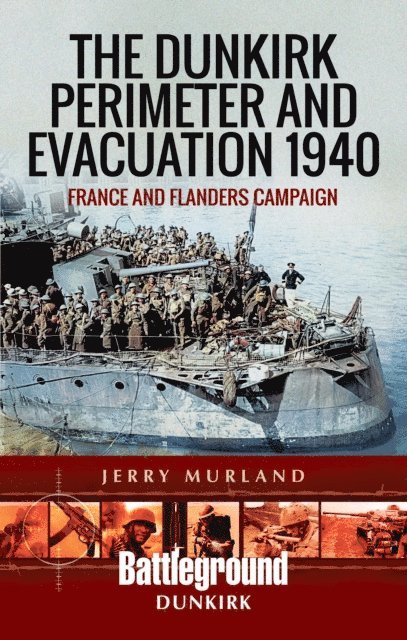
The book, the latest in a series of eight Battleground Europe books that deals with the BEF's campaign in France and Flanders in 1940, covers the fierce fighting around the Dunkerque Perimeter during May and June 1940 between the retreating British Expeditionary Force and its French allies and the advancing German army. It covers the area that most people in Britain associate with the fighting in France in 1940, a military disaster that could have been much worse. This grievous military setback was soon transformed into a morale boosting symbol of the resilience of the British against a Germany that had crushed so many nations in a matter of weeks.With over 200 black and white photographs and fourteen maps, this book looks in some detail at the units deployed around Dunkerque and Nieuport and their often desperate actions to prevent the inevitable advance of German forces opposing them. The evacuation of the BEF from the beaches east of Dunkerque is covered in detail from the perspective of the Royal Navy and from the standpoint of the soldier on the beaches. Unusual for a Battleground Europe publication is the inclusion of a walk and drive around Ramsgate and Dover, covering the English end of the evacuation.In addition to visits to the relevant cemeteries, the book includes three appendices and two car tours, one tour covering the whole of the Dunkirk perimeter and the other covering Ramsgate and Dover, although there is plenty of scope for walking in both tours. There is also a walk around De Panne, which takes the tourist along the beach that saw so much of the evacuation, and into the back areas of the town where the Germans left their mark when clearing up after the British had gone.

E-bok
Engelska, 201915 kr
Läs direkt efter köp
The history of a disastrous WWII setback, including numerous photos, maps, and information for visitors. This book tells the story of the fierce fighting around the Dunkirk Perimeter during May and June 1940 between the retreating British Expeditionary Force and its French allies and the advancing German army. This grievous military setback was soon transformed into a morale-boosting symbol of the resilience of the British against a Germany that had crushed so many nations in a matter of weeks. With over 200 black and white photographs and fourteen maps, this book looks at the units deployed around Dunkirk and Nieuport and their often desperate actions to prevent the inevitable advance of German forces opposing them. The evacuation of the BEF from the beaches east of Dunkirk is covered in detail from the perspective of the Royal Navy and from the standpoint of the soldier on the beaches. Also included are details for travelers to the sites involved. In addition to visits to the relevant cemeteries, the book includes three appendices and two car tours, one tour covering the whole of the Dunkirk perimeter and the other covering Ramsgate and Dover, although there is plenty of scope for walking in both tours. There is also a walk around De Panne, which takes the tourist along the beach that saw so much of the evacuation, and into the back areas of the town where the Germans left their mark when clearing up after the British had gone.
E-bok
PDF, Engelska, 201915 kr
Läs direkt efter köp
The history of a disastrous WWII setback, including numerous photos, maps, and information for visitors. This book tells the story of the fierce fighting around the Dunkirk Perimeter during May and June 1940 between the retreating British Expeditionary Force and its French allies and the advancing German army. This grievous military setback was soon transformed into a morale-boosting symbol of the resilience of the British against a Germany that had crushed so many nations in a matter of weeks. With over 200 black and white photographs and fourteen maps, this book looks at the units deployed around Dunkirk and Nieuport and their often desperate actions to prevent the inevitable advance of German forces opposing them. The evacuation of the BEF from the beaches east of Dunkirk is covered in detail from the perspective of the Royal Navy and from the standpoint of the soldier on the beaches. Also included are details for travelers to the sites involved. In addition to visits to the relevant cemeteries, the book includes three appendices and two car tours, one tour covering the whole of the Dunkirk perimeter and the other covering Ramsgate and Dover, although there is plenty of scope for walking in both tours. There is also a walk around De Panne, which takes the tourist along the beach that saw so much of the evacuation, and into the back areas of the town where the Germans left their mark when clearing up after the British had gone.
Häftad, Engelska, 2024
166 kr
Skickas
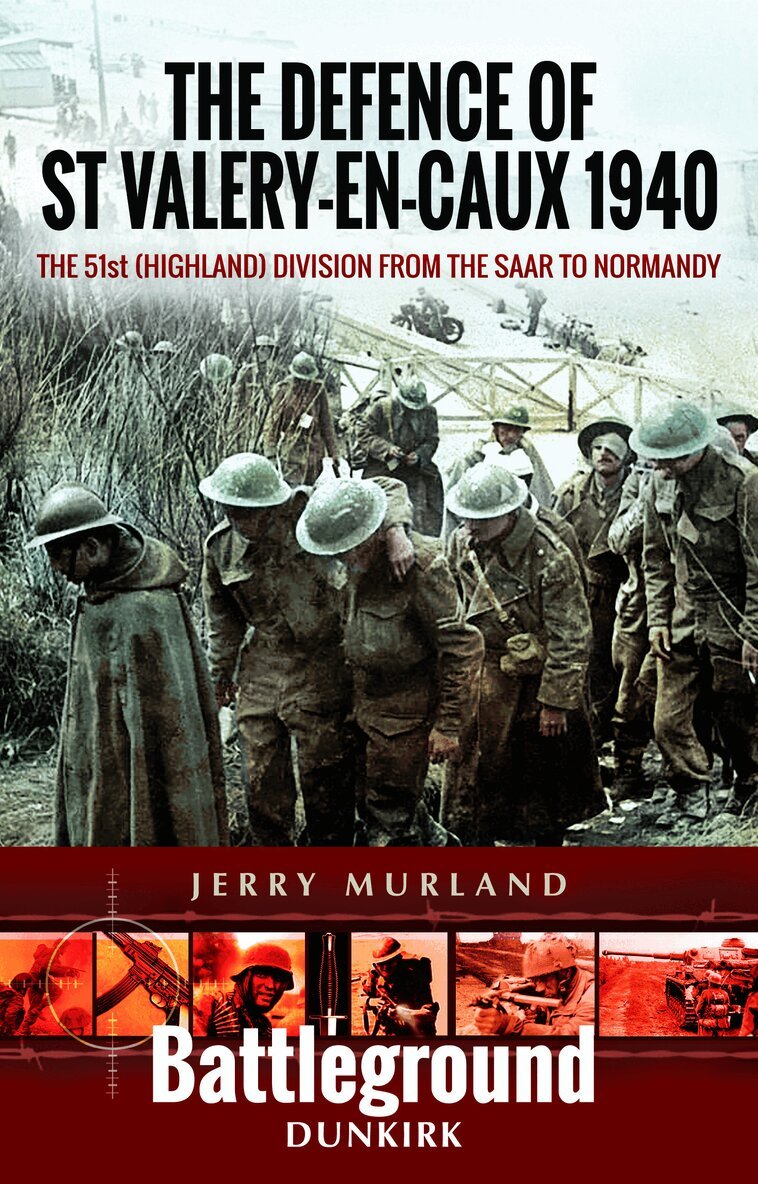
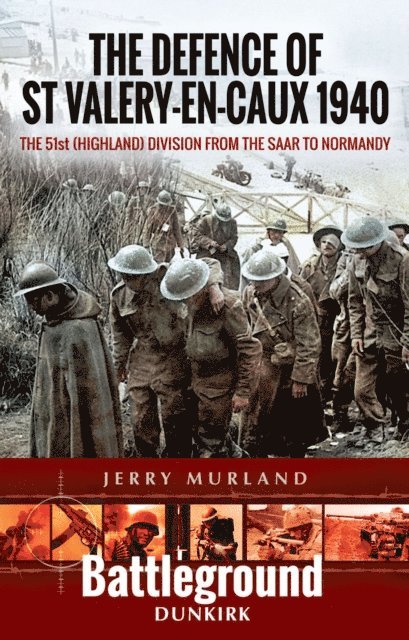
The story of the 51st (Highland) Division during 1939 and 1940 is a short and largely tragic one and although it firmly burnt itself into the minds of Scotsmen it has never been granted the recognition it deserves. Even in Scotland it is often forgotten that the men, and attached troops, of the 51st Division, were fighting for survival in Normandy for some ten days after the evacuation from Dunkerque had been completed. Most present-day accounts of the Second World War in 1939/40 deal with the ‘Phoney War’ and the evacuation from Dunkerque but few mention the rearguard action at St Valery-en-Caux, other than a giving it a passing mention. Nevertheless, the action of the 51st Division against the might of German forces won the admiration of General Erwin Rommel and Charles De Gaulle, who fought against and alongside them.One of the enduring beliefs is that Churchill deliberately sacrificed the 51st Division in an attempt to keep France in the war; this, apart from being palpably incorrect, fails miserably to address the intricacy of the circumstances that overtook the 51st Division after they returned from the Saar. In a situation where units were repeatedly changing affiliation, communication between the French Supreme Command and British forces suffered language difficulties and the inclination to blame each other for the debacle that inevitably ensued. Nevertheless, for all the criticism that is thrown at the French Army, it is clear that a number of French units fought hard and with great courage, the main fault with the French command lying with poor leadership and lack of tactical planning.As far as the Highlanders were concerned it was bad luck that their term of duty on the Saar coincided with the beginning of Fall Rot. The speed and extent of the German advance from Abbeville took their own High Command and the French by surprise and it was with little wonder that Allied military thinking failed to keep up with actions on the battlefield. The theory that Churchill sacrificed the division to keep the French in the war owes a great deal to the Scottish need to attribute all the misery of the world to one scoundrel, a trait that exists to this day!Supported by eleven maps and over 150 photographs, the book traces the history of the 51st Division from its inception until its final surrender at St Valery-en-Caux and deals with the fighting on the Saar and the often ragged skirmishing though Normandy. The book also touches on the actions of the 1st Armoured Division and the Battle of Abbeville. There are three walks and a car tour included in this volume which allows the battlefield visitor to base themselves firstly in Abbeville and, secondly, further into Normandy.
E-bok
PDF, Engelska, 202429 kr
Läs direkt efter köp
Supported by eleven maps and over 150 photographs, this is the story of Scottish Troops fighting for survival in Normandy.The story of the 51st (Highland) Division during 1939 and 1940 is a short and largely tragic one and although it firmly burnt itself into the minds of Scotsmen it has never been granted the recognition it deserves. Even in Scotland it is often forgotten that the men, and attached troops, of the 51st Division, were fighting for survival in Normandy for some ten days after the evacuation from Dunkerque had been completed. Most present-day accounts of the Second World War in 1939/40 deal with the ‘Phoney War’ and the evacuation from Dunkerque but few mention the rearguard action at St Valery-en-Caux, other than a giving it a passing mention. Nevertheless, the action of the 51st Division against the might of German forces won the admiration of General Erwin Rommel and Charles De Gaulle, who fought against and alongside them.One of the enduring beliefs is that Churchill deliberately sacrificed the 51st Division in an attempt to keep France in the war; this, apart from being palpably incorrect, fails miserably to address the intricacy of the circumstances that overtook the 51st Division after they returned from the Saar. In a situation where units were repeatedly changing affiliation, communication between the French Supreme Command and British forces suffered language difficulties and the inclination to blame each other for the debacle that inevitably ensued. Nevertheless, for all the criticism that is thrown at the French Army, it is clear that a number of French units fought hard and with great courage, the main fault with the French command lying with poor leadership and lack of tactical planning.As far as the Highlanders were concerned it was bad luck that their term of duty on the Saar coincided with the beginning of Fall Rot. The speed and extent of the German advance from Abbeville took their own High Command and the French by surprise and it was with little wonder that Allied military thinking failed to keep up with actions on the battlefield. The theory that Churchill sacrificed the division to keep the French in the war owes a great deal to the Scottish need to attribute all the misery of the world to one scoundrel, a trait that exists to this day!Supported by eleven maps and over 150 photographs, the book traces the history of the 51st Division from its inception until its final surrender at St Valery-en-Caux and deals with the fighting on the Saar and the often ragged skirmishing though Normandy. The book also touches on the actions of the 1st armored Division and the Battle of Abbeville. There are three walks and a car tour included in this volume which allows the battlefield visitor to base themselves firstly in Abbeville and, secondly, further into Normandy.
Häftad, Engelska, 2019
156 kr
Skickas
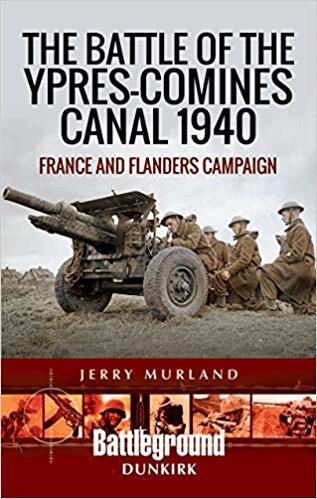
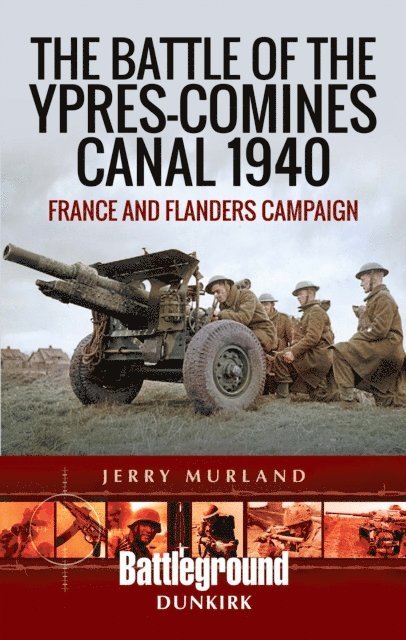
Known in some accounts as the Battle of Wijtschaete, the confrontation along the Ypres-Comines Canal in 1940 is still hardly remembered in this country and, apart from the battle honours displayed proudly on the colours of the regiments who took part - many no longer in existence, very little has been written about the four days which probably saved the British Expeditionary Force (BEF) from almost complete destruction. This is quite surprising, given the pivotal nature of the battle, for without the sacrifice of the battalions on the canal there would probably have been no evacuation from Dunkerque on the scale to which we have become accustomed, and the war may well have taken on a different outcome.Although there was fighting north of Ypres along the Canal Van Ieper Naar De Ijzer, where 151 Brigade and the 3rd Division were deployed, the actual Battle of the Ypres-Comines Canal took place to the south, where the three divisions of General der Infantry Viktor von Schwedler's IV Korps were pitted against three British brigades along the disused canal which runs from Comines in the south to Ypres in the north.The book looks in detail at the order of battle of the British and German units engaged and focuses on the four British brigades that fought on the canal. The mainly territorial 143 Brigade was positioned in the south, 13 Brigade was in the middle and 17 Brigade held the northern end of the line up to Zillebeke Lake. Apart from the 12/Lancers and a few tanks from 3/RTR, Ypres itself was largely defended by 150 Brigade. Major General Franklyn's instructions were to hold the line for as long as possible to allow the remainder of the BEF to strengthen the Dunkerque Perimeter.With over 150 contemporary and modern black and white photographs, ten maps, and visits to eight CWGC Cemeteries, the book enables the battlefield tourist to explore the area and undertake three car tours together with two short walks. Visitors will no doubt wish to combine a visit to the First World War sites around Ypres with the fighting along the canal in 1940, recognizing many places that were fought over in both wars

E-bok
Engelska, 202086 kr
Läs direkt efter köp
This WWII history and battlefield guide explores the significant yet lesser-known WWII combat along the Ypres-Comines Canal during the Battle of France.Known in some accounts as the Battle of Wijtschaete, the confrontation along the Ypres-Comines Canal in 1940 is too often overlooked despite its significance. The sacrifice of the battalions on the canal was vital to the all-important retreat to Dunkirk. The four-day conflict likely saved the British Expeditionary Force from almost complete destruction.Although there was fighting north of Ypres along the Canal Van Ieper Naar De Ijzer, the actual Battle of the Ypres-Comines Canal took place to the south. Three British brigades were pitted against three German divisions along the disused canal which runs from Comines in the south to Ypres in the north. Military historian Jerry Murland covers the order of battle of the British and German units engaged in the fighting.With more than 150 historic and modern photographs, ten maps, visits to eight CWGC Cemeteries, plus three car tours and two walking itineraries, this volume is an essential companion for exploring the area. Visitors will no doubt wish to combine a visit to the First World War sites around Ypres with the fighting along the canal in 1940, recognizing many places that were fought over in both wars.
E-bok
PDF, Engelska, 202086 kr
Läs direkt efter köp
This WWII history and battlefield guide explores the significant yet lesser-known WWII combat along the Ypres-Comines Canal during the Battle of France. Known in some accounts as the Battle of Wijtschaete, the confrontation along the Ypres-Comines Canal in 1940 is too often overlooked despite its significance. The sacrifice of the battalions on the canal was vital to the all-important retreat to Dunkirk. The four-day conflict likely saved the British Expeditionary Force from almost complete destruction. Although there was fighting north of Ypres along the Canal Van Ieper Naar De Ijzer, the actual Battle of the Ypres-Comines Canal took place to the south. Three British brigades were pitted against three German divisions along the disused canal which runs from Comines in the south to Ypres in the north. Military historian Jerry Murland covers the order of battle of the British and German units engaged in the fighting. With more than 150 historic and modern photographs, ten maps, visits to eight CWGC Cemeteries, plus three car tours and two walking itineraries, this volume is an essential companion for exploring the area. Visitors will no doubt wish to combine a visit to the First World War sites around Ypres with the fighting along the canal in 1940, recognizing many places that were fought over in both wars.
Häftad, Engelska, 2017
156 kr
Skickas
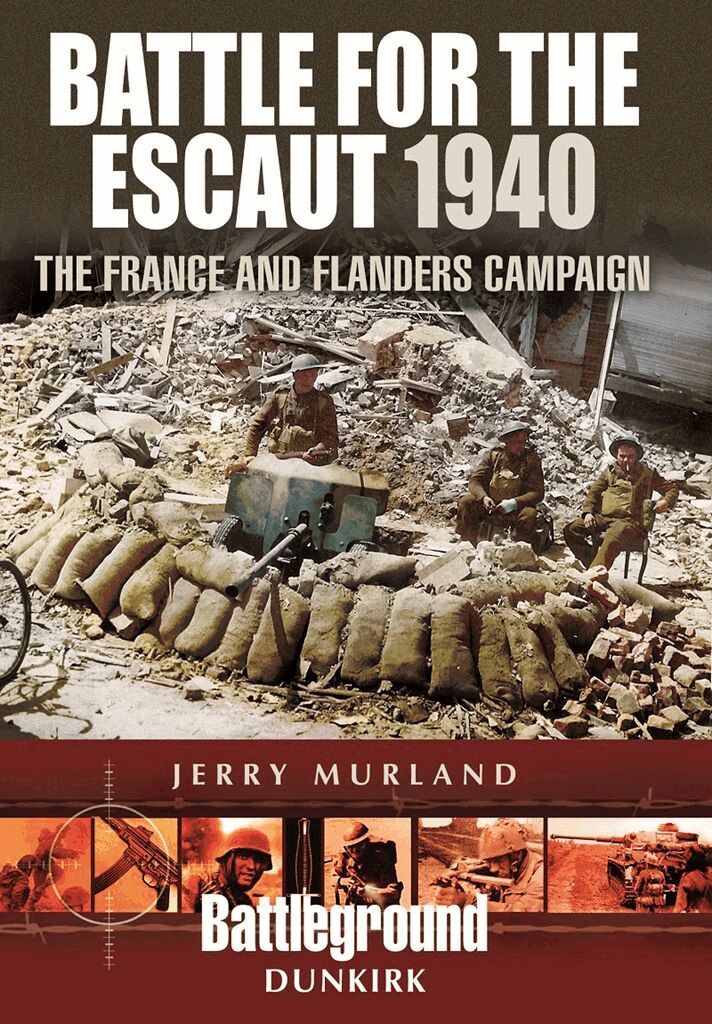
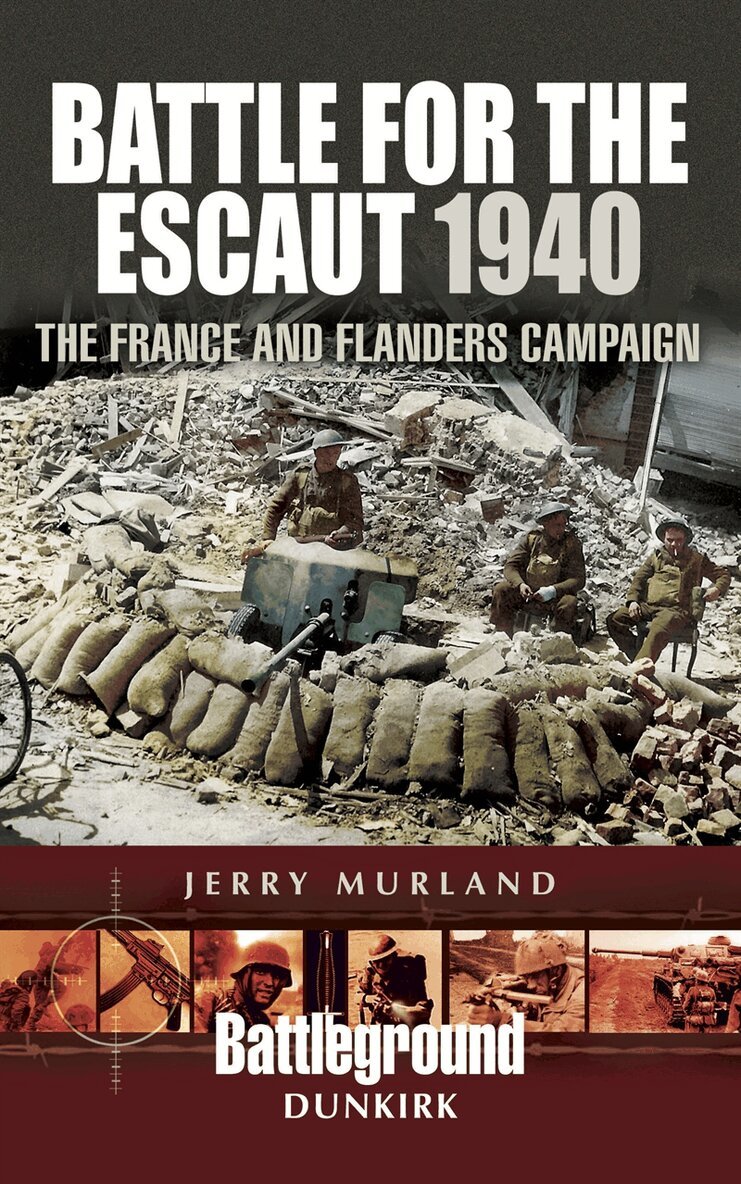
On 10 May 1940 the British Expeditionary Force (BEF), under the command of Lord Gort, moved forward from the Franco-Belgian border and took up positions along a 20-mile sector off the River Dyle, to await the arrival of the German Army Group B. Their expected stay was considerably shorter than planned as the German Army Group A pushed its way through the Ardennes and crossed the Meuse at Sedan, scattering the French before them. Little did the men of the BEF realise that the orders to retire would result in their evacuation from Dunkirk and other channel ports. The line of the River Escaut was seen as the last real opportunity for the Allied armies to halt the advancing German Army, but the jigsaw of defence was tenuous and the allied hold on the river was undone by the weight of opposing German forces and the speed of the armoured 'Blitzkrieg' thrust further south. As far as the BEF were concerned, the Battle for the Escaut took place on a 30-mile sector from Oudenaarde to Bleharies and involved units in a sometimes desperate defence, during which two Victoria Crosses were awarded.This book takes the battlefield tourist from Oudenaarde to Hollain in a series of tours that retrace the footsteps of the BEF.With the help of local historians, the author has pinpointed crucial actions and answered some of the myriad questions associated with this important phase of the France and Flanders campaign of 1940.
E-bok
Engelska, 2021123 kr
Läs direkt efter köp
On 10 May 1940 the British Expeditionary Force (BEF), under the command of Lord Gort, moved forward from the Franco-Belgian border and took up positions along a 20-mile sector off the River Dyle, to await the arrival of the German Army Group B. Their expected stay was considerably shorter than planned as the German Army Group A pushed its way through the Ardennes and crossed the Meuse at Sedan, scattering the French before them. Little did the men of the BEF realize that the orders to retire would result in their evacuation from Dunkirk and other channel ports.The line of the River Escaut was seen as the last real opportunity for the Allied armies to halt the advancing German Army, but the jigsaw of defense was tenuous and the allied hold on the river was undone by the weight of opposing German forces and the speed of the armored ‘Blitzkrieg’ thrust further south. As far as the BEF were concerned, the Battle for the Escaut took place on a 30-mile sector from Oudenaarde to Bléharies and involved units in a sometimes desperate defense, during which two Victoria Crosses were awarded. This book takes the battlefield tourist from Oudenaarde to Hollain in a series of tours that retrace the footsteps of the BEF. With the help of local historians, the author has pinpointed crucial actions and answered some of the myriad questions associated with this important phase of the France and Flanders campaign of 1940.EPUB3: Reflowable
Häftad, Engelska, 2017
156 kr
Skickas
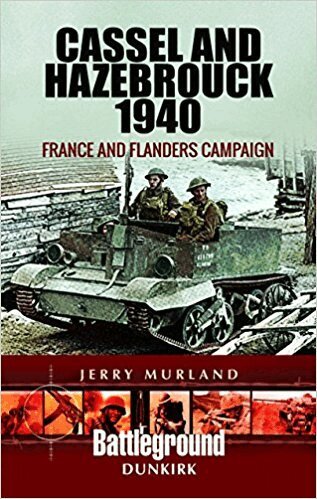
This is the first detailed account of the rearguard action that took place between 25 and 29 May 1940 at Cassel and Hazebrouck on the western perimeter of the Dunkirk Corridor. By 25 May the decision to evacuate the BEF via Dunkirk had already been taken, Lord Gort, commanding the BEF in France, had given instructions to Lieutenant General Sir Ronald Adam to relinquish his command of III Corps and prepare a perimeter of defence around Dunkirk. As part of the western defensive line of the Dunkirk Corridor, 145 Brigade were deployed to Cassel and Hazebrouck with the instructions to hold the two towns until the last man. Under the command of Brigadier Nigel Somerset, the brigade occupied Hazebrouck with the infantry of 1st Buckinghamshire Battalion and Cassel with the 4/Ox and Bucks Light infantry together with the regulars of the 2nd Battalion Gloucestershire Regiment. Attached to Somerset s meagre force was a number of units that had previously been part of two of Gort s ad hoc formations - Macforce and Woodforce, and it was with these men that the two towns were fortified against the advancing German armoured divisions.?While Hazebrouck was overwhelmed very quickly, the hilltop town of Cassel held out for much longer with German forces failing to consolidate any penetration of the perimeter.The book looks closely at the deployment of units in both towns and focuses on the individuals involved in the defence and the subsequent break-out, which ended in capture or death for so many. There are two car tours that explore the surrounding area of Cassel and the deployment of platoons within Hazebrouck. These are supplemented by two walking tours, one in Cassel itself and the second further to the west of the town around the area controlled by B and D Companies of the 2nd Gloucesters. The book is illustrated with ten maps and over 100 modern and contemporary photographs.
Häftad, Engelska, 2017
156 kr
Skickas
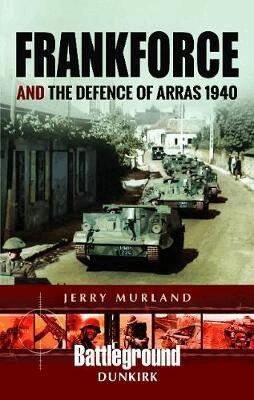
There is no other city in France that has the same associations in time of conflict that the British have with Arras. Since the campaigns of John Churchill, 1st Duke of Marlborough, in the early 18th century, British soldiers have fought in and around Arras, occasionally as an enemy but, more often, as defenders of French and Allied democracy. Battlefield visitors to the area will immediately recognize the names of towns and villages that were as significant to the men of Marlborough s army as they were to those who fought in the First and Second World Wars. This book serves both as guide to the Second World War battlefields that surround the city and its environs as well as detailing the actions of the British armoured attack of 21 May 1940\. The book looks at the strategic situation that led up to the famous Arras counter-stroke and, using material that has not been published before, examines the British and German actions between 20 and 23 May. The only Victoria Cross action that took place during this time is looked at in detail; as is the fighting that took place in Arras and during the breakout.Despite its shortcomings, the counter-stroke achieved the essential element of surprise and caused widespread alarm amongst the German command and hit Rommel s 7th Panzer Division at precisely the moment when his armoured units were ahead of the infantry and gunners. The British infantry fought well and both the Durham battalions were fortunate that their commanding officers and senior NCOs were men who had already fought in one conflict and possessed the determination to rally their less experienced junior ranks and fight on regardless. Such was the case with the two tank battalions, although sadly they lost both their commanding officers and over half the tanks that went into the engagement. The attack did enable the British to tighten their hold on Arras albeit temporarily and, as is often cited, built doubts in the minds of German High Command as to the speed of their advance and contributed to the subsequent Hitler halt order of 24-27 May.The author has gone to some lengths to track down accounts from those individuals who served in the area during May 1940 and fought the enveloping tide of the German advance The book is supported by three car tours, one of which takes the visitor along the tragic path taken by the Tyneside Scottish on 20 May and two walking routes, which concentrate on Arras. 137 black and white photographs (integrated) and a number of maps derived from regimental histories; and six tour maps provide the battlefield visitor with illustrations of the battlefields as they were in 1940 and as they are today.
E-bok
Engelska, 2021122 kr
Läs direkt efter köp
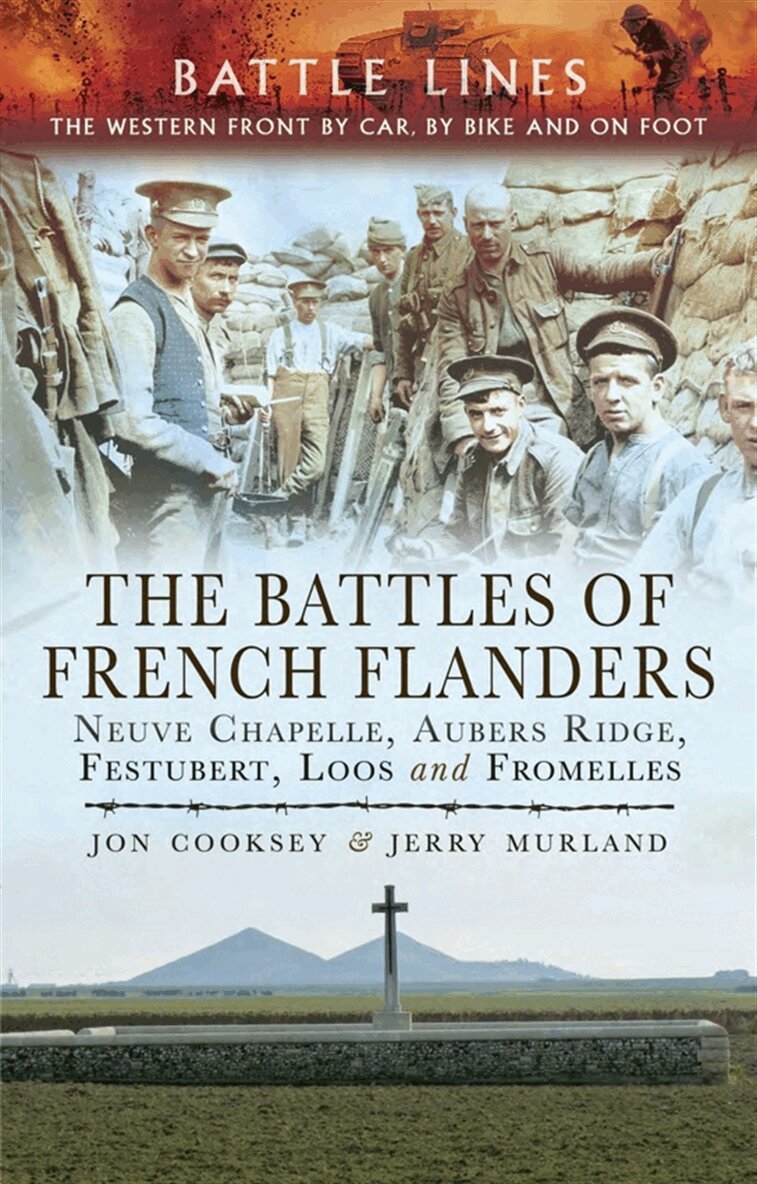
The battles fought by the British army in 1915, in the second year of the First World War, are less well known than those fought immediately after the outbreak of war in 1914 and those that followed in 1916 which culminated in the Battle of the Somme. But the fighting at Aubers Ridge, Festubert, Neuve Chapelle and Loos was just as severe – as was the 1916 battle at Fromelles – and the battlefields are just as interesting to explore today. This volume in the Battle Lines series is the perfect guide to them.
Expert guides Jon Cooksey and Jerry Murland take visitors over a series of routes that can be walked, biked or driven, explaining the fighting that occurred at each place in vivid detail. They describe what happened, where it happened and why and who was involved, and point out the sights that remain for the visitor to see. Their highly illustrated guidebook is essential reading for visitors who wish to enhance their understanding of warfare on the Western Front.
E-bok
Engelska, 2021122 kr
Läs direkt efter köp
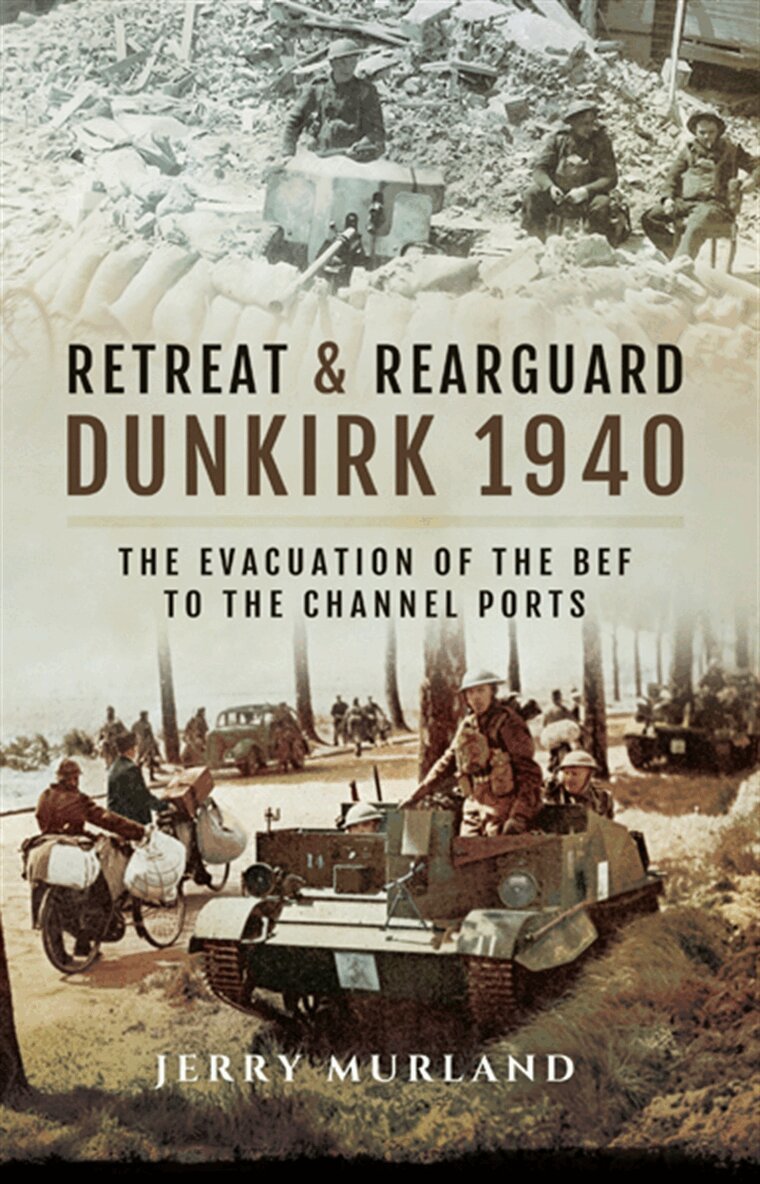
This book, the third title in the Author’s Retreat and Rearguard series, covers the actions of the BEF during the retreat from the Dyle Line to the evacuation points of Dunkirk, Boulogne, Calais, St Valery-en-Caux and finally the Cherbourg Peninsula.Some of the engagements are relatively well known (Cassell, the Arras counter-attack and the notorious Le Paradis SS massacre) but the author has unearthed many less known engagements from the long and painful withdrawal. While the main Dunkirk evacuation from the port and beaches was over by early June, elements of the BEF fought on until 21 June.In relating those, often heroic, actions the author catches the atmosphere of desperate defiance that typified this never-to-be-forgotten period.
Häftad, Engelska, 2019
166 kr
Skickas
The First World War battlefields to the north of Arras - including Vimy Ridge - are among the most famous and most visited sites on the Western Front, rivalled only by those around Ypres and the Somme, and this clearly written, highly illustrated guide is the ideal introduction to them.Visitors can trace for themselves the course of each battle across the modern landscape and gain a fascinating insight into the nature of the fighting in the area - and the wider conflict across the Western Front - throughout the war. The book covers the key battles fought in the northern sector of the Arras front, including the 1917 Battle of Vimy Ridge and battles at Villers au Bois, Oppy Wood and Gavrelle.Expert guides Jon Cooksey and Jerry Murland have devised a series of routes that can be walked, biked or driven, explaining the fighting that occurred at each place in vivid detail. They record what happened, where it happened and why, and point out the sights that remain for the visitor to see. Their guidebook is essential reading for visitors who wish to enhance their understanding of the war on the Western Front.

E-bok
Engelska, 201915 kr
Läs direkt efter köp
A guidebook for those planning a tour of this key battleground of the First World War. The First World War battlefields to the north of Arras—including Vimy Ridge—are among the most famous and most visited sites on the Western Front, rivaled only by those around Ypres and the Somme, and this clearly written, highly illustrated guide is the ideal introduction to them. Visitors can trace for themselves the course of each battle across the modern landscape and gain a fascinating insight into the nature of the fighting in the area—and the wider conflict across the Western Front—throughout the war. The book covers the key battles fought in the northern sector of the Arras front, including the 1917 Battle of Vimy Ridge and battles at Villers au Bois, Oppy Wood, and Gavrelle. Expert guides Jon Cooksey and Jerry Murland have devised a series of routes that can be walked, biked, or driven, explaining the fighting that occurred at each place in vivid detail. They record what happened, where it happened, and why, and point out the sights that remain for the visitor to see. Their guidebook is essential reading for visitors who wish to enhance their understanding of the war on the Western Front.

E-bok
PDF, Engelska, 2019147 kr
Läs direkt efter köp
A guidebook for those planning a tour of this key battleground of the First World War. The First World War battlefields to the north of Arras including Vimy Ridge are among the most famous and most visited sites on the Western Front, rivaled only by those around Ypres and the Somme, and this clearly written, highly illustrated guide is the ideal introduction to them. Visitors can trace for themselves the course of each battle across the modern landscape and gain a fascinating insight into the nature of the fighting in the area and the wider conflict across the Western Front throughout the war. The book covers the key battles fought in the northern sector of the Arras front, including the 1917 Battle of Vimy Ridge and battles at Villers au Bois, Oppy Wood, and Gavrelle. Expert guides Jon Cooksey and Jerry Murland have devised a series of routes that can be walked, biked, or driven, explaining the fighting that occurred at each place in vivid detail. They record what happened, where it happened, and why, and point out the sights that remain for the visitor to see. Their guidebook is essential reading for visitors who wish to enhance their understanding of the war on the Western Front.
E-bok
Engelska, 2021122 kr
Läs direkt efter köp
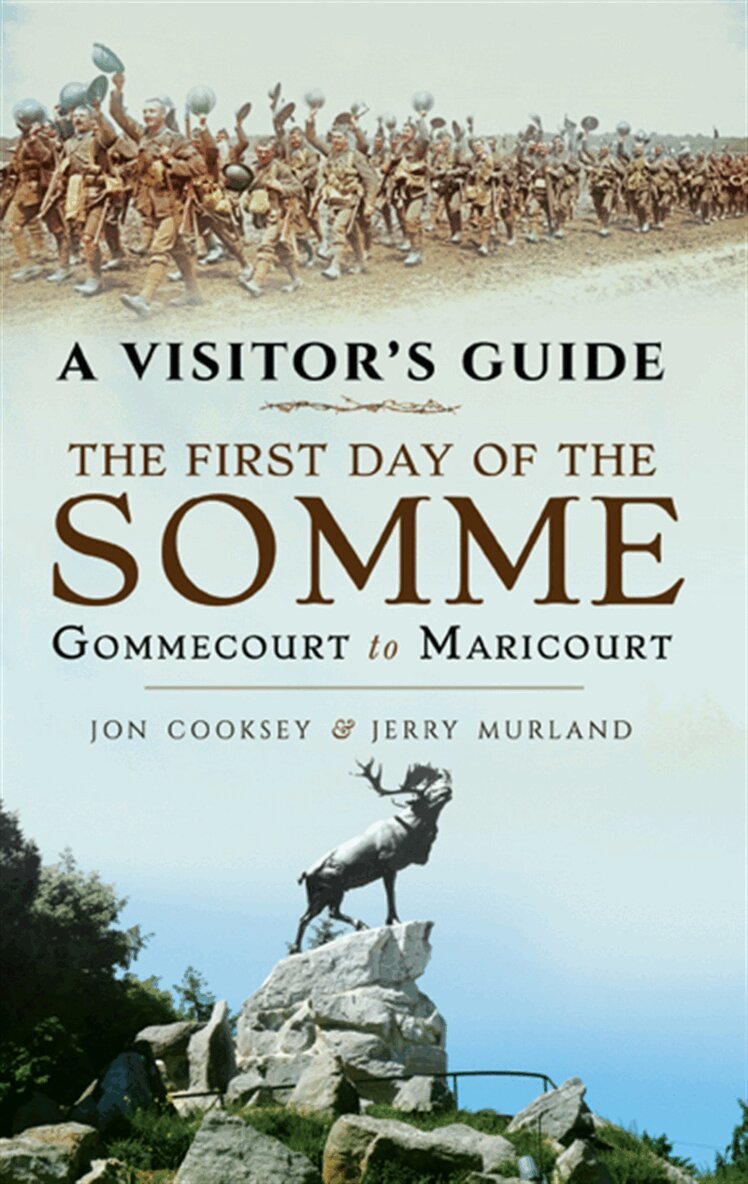
Many guidebooks cover the Somme offensive in 1916, the five-month struggle that has come to be seen as one of the defining episodes in the history of the fighting on the Western Front during the First World War. But no previous guide has concentrated on t
E-bok
Engelska, 2021146 kr
Läs direkt efter köp
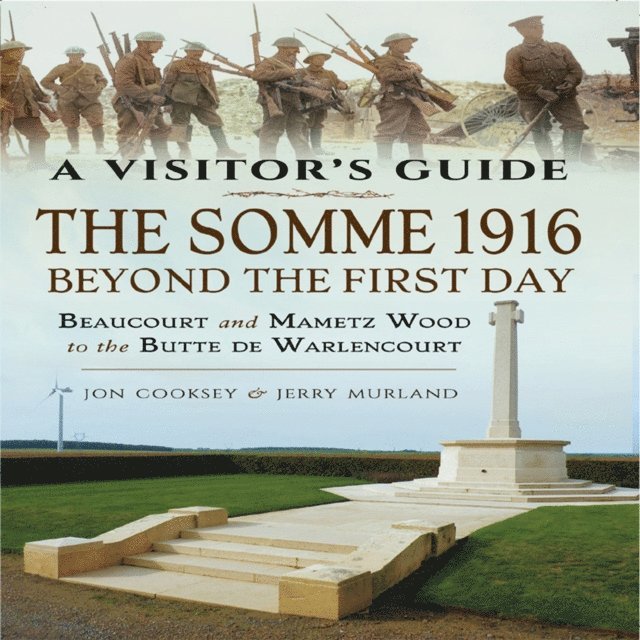
In their second Visitor’s Guide to the 1916 Battle of the Somme Jon Cooksey and Jerry Murland focus on the series of secondary battles that were key stages in the five-month struggle that followed the start of the offensive on 1 July. They take the visitor – and the reader – across the entire battlefield, covering in graphic detail sites where actions took place that are almost as famous as the Somme itself in the history of the First World War, including Mametz Wood, High Wood, Deville Wood, Guillemont, Ginchy, Pozieres and Flers. They also provide tours of the less-well-known but equally interesting sites which played important parts in the offensive as a whole. In a sequence of routes that can be walked, biked or driven they describe what happened in each place, identify the units involved, highlight the experience and exploits of individual soldiers, and point out the notable sights, monuments and cemeteries. This highly illustrated guidebook is essential reading for visitors who wish to enhance their understanding of the Battle of the Somme and the war on the Western Front. It is also the ideal companion volume to The First Day of the Somme: Gommecourt to Maricourt by the same authors.

Häftad, Engelska, 2019
166 kr
Skickas
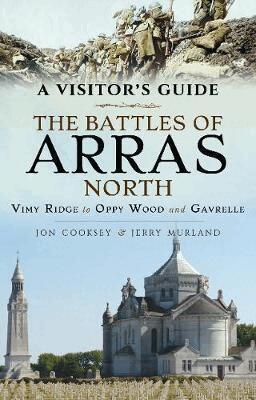
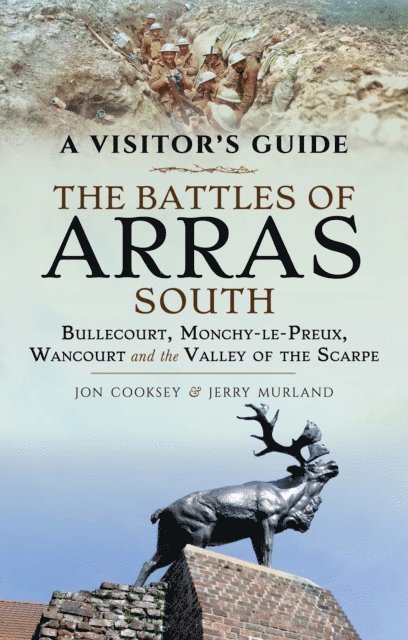
The First World War battlefields to the south of Arras - including Battery Valley and Observation Ridge, Telegraph Hill, Monchy-le-Preux, Wancourt, and Bullecourt - are among the most famous and most visited sites on the Western Front, rivalled only by those around Ypres and the Somme, and this clearly written, highly illustrated guide is the ideal introduction to them.Visitors can trace for themselves the course of each battle across the modern landscape and gain a fascinating insight into the nature of the fighting in the area - and the wider conflict across the Western Front - throughout the war. The book covers the key battles fought in the southern sector of the Arras front, including the 1917 battles fought at Battery Valley, Monchy-le-Preux, Wancourt and Bullecourt.Expert guides Jon Cooksey and Jerry Murland have devised a series of routes that can be walked, biked or driven, explaining the fighting that occurred at each place in vivid detail. They record what happened, where it happened and why, and point out the sights that remain for the visitor to see. Their guidebook is essential reading for visitors who wish to enhance their understanding of the war on the Western Front.
E-bok
Engelska, 202090 kr
Läs direkt efter köp
An illustrated and informative guide to the WWI battlefields south of Arras, France, including some of the most significant battles of 1917.Some of the most famous and frequently visited battlefields on the Western Front are just to the south of the Arras. These sites include Battery Valley and Observation Ridge, Telegraph Hill, Monchy-le-Preux, Wancourt, and Bullecourt. And this clearly written, highly illustrated guide is the ideal introduction to them.Expert guides Jon Cooksey and Jerry Murland have devised a series of routes that can be walked, biked or driven, explaining the fighting that occurred at each place in vivid detail. They record what happened, where it happened and why, pointing out the sights that remain for the visitor to see. The featured itineraries allow visitors to trace the course of each battle across the modern landscape, gaining visceral insight into the nature of combat throughout the war.